When stars start to get over exposed during data collection, their core may become a different colour than the normally exposed outer halo. When the stacked image is stretched using MaskedStretch in PixInsight, stars are stretched less than dimmer parts. This means that stars in the stretched image are not saturated, and can display an odd colour. PixInsight has a script that can correct star cores of partially saturated stars. It is called "Repaired HSV Separation", and can be found under Scripts -> Utilities. The script should be applied just before the first stretch. It will decompose the colour image into H, Sv, and V colour components, and repair the colour values of the stars.
The different components are then to be combined using the ChannelCombination process (which is under ColorSpaces).
The upper part of the dialog box is used to determine which images are to be created, while the lower part is used for repair of the H, Sv, and V channels.For best results, mainly the Repair level parameter needs to be adjusted.
Alejandro Tombolini (who brought this script to my attention), recommends to use the unrepaired V channel when combining the channels. But experiment to find out if the repaired or unrepaired V channel works best. Be sure to select the HSV colour space.
Here's how it affected one of my most recent images, a before and after shot of the Pleiades (M45). Look at the core of the brightes stars. In the original image, the cores arepink in colour, while in the repaired image, they are blue, the same colour as the outer haloes.
lördag 14 januari 2017
tisdag 3 januari 2017
Correcting dark lines in dslr astro images
My Pentax DSLR suffers from dark horizontal lines when I photograph bright stars. I'm not sure about the cause of this, but it may be some reverse blooming or ADC related issue. This issue isn't uncommon for digital cameras, but it sure is a nuisance.
Alejandro Tombolini showed in one of his processing examples how to deal with these lines. Here's my adaptation of his process.
I will use the CanonBandingReduction script to correct the lines. This script works only on entire images, and can introduce an uneven background and other artefacts when used on images which do not have bands across the entire width.
I therefore start with making a preview that contains the area I want to correct. I leave some margin, because later on I will clone the preview and shrink the clone.
By dragging the preview onto the workspace, I create a new image, which I apply the CBR script on.
The next step is to make this preview the same size as the original image. For this I use the crop tool.
Set the margins such that the image becomes the correct size, with the corrected image now in the same place as the preview in the original. If the result is ok, the image is saved as xisf file.
Next I shrink the preview in the original image and create a hole in the image where the preview is. For this I use pixelmath.
A new image is created with a black patch where the (smaller) preview was.
This image is also saved.
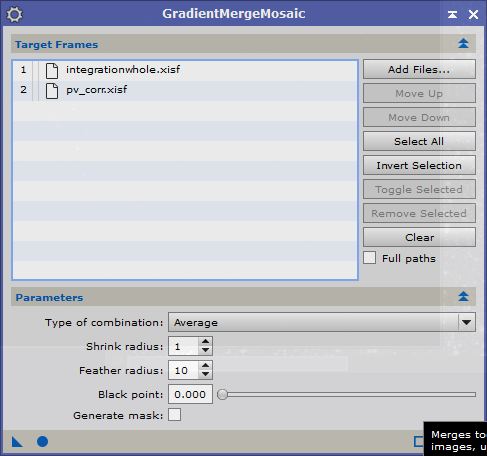
Finally the two saved images (the corrected preview, and the uncorrected image with the black patch) are merged using GradientMergeMosaic.
And this is the corrected image
Prenumerera på:
Kommentarer (Atom)


