onsdag 27 juli 2016

PixInsight process icons

When you process an image, it's always handy to copy the processes you use to the workspace. You can do this by dragging the little triangle in the lower left corner onto the workspace. This will preserve the settings for that instance.
The only problem with this is that all process icons get a name ProcessXX, where XX is a number.
It is easy to change this name to something more sensible:
Click on the small N on the right hand side of the icon. This will open a dialog box where you can change the icon name. If you want to add a description, you click on the small D. Use this for example to write which mask you used for the process.
process and image icons
Image icons have no description, but you can change their name. Also note that process icons are full rectangles, while image icons have one corner missing.

torsdag 21 juli 2016

The effect of dithering

Some time ago I wrote about how dithering can improve the quality of raw images.
If you control your camera and mount from a computer, you can use software to apply small mount movements between exposures. Some programs use random movements of the RA and DEC axes to avoid patterns in your stacked images.
Unfortunately, almost all camera control software is written for either Canon or Nikon cameras. Since I have an old Pentax camera, which has a quirky usb connector, I can't control it from my computer.
I've written about my ditherbox earlier. Here's an example of how it works.
This short video shows the effect of dithering. M45 was the target, and some 46 images were taken and registered. Before registering, the target is placed on different parts of the sensor according to the dithering pattern. After registering, the target is stationary, and the noise pattern moves against the dithering pattern. This is clearly seen in the video.


onsdag 13 juli 2016

Noise reduction for DSLR astro images


Astro images taken with a DSLR at a high ISO setting are noisy, and the best way to decrease the noise level is of course to take lots of images and stack these. But even then, some sort of noise reduction is necessary.
Noise in DSLR images manifests itself as intensity noise and colour noise. Think of it this way; noise is a random variation in pixel values. Pixel values can either vary in intensity, more or less intensity of the same colour, or in colour, same intensity but another colour. Both these variations have to be addressed by a noise reduction process.
Here I will show you my procedure for DSLR images.
First I apply noise reduction to the luminance or lightness (colour intensity) of the image, and then a very aggresive noise reduction to the chrominance (colour variation).
One of the most efficient luminance noise reduction methods in PixInsight is TGVdenoise. This method is especially good at reducing high frequency (or small scale) intensity noise, and is based on a diffusion algorithm. This means that it detects variation in pixel values and pushes these variation outwards, away from the pixel. As in any diffusion process, the longer you let the process continue, the stronger the spreading process will be. In the case of TGVdenoise this means that you let the process go through many iterations.

One of the best ways to use TGVdenoise was devised by Philippe Bernard. A presentation in french can be found on his website; TGVDenoise. A slightly updated version was presented on the PixInsight forum by member Tromat.
(Always have a  STF stretch applied to the image. This keeps the image in its linear state, but allows you to see on screen what the image looks like. Also, always test the settings on a small preview that contains both background and a weak signal you want to preserve.)
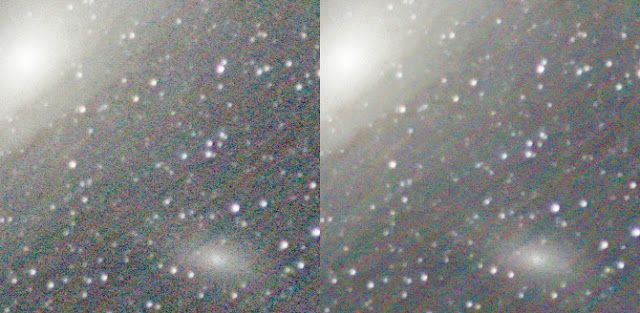

Before and after luminance noise reduction, using TGVdenoise

The second stage of noise reduction is to reduce colour noise, or chrominance noise. For this I use the MultiscaleMedianTransform.
In the noise reduced image, you will probably still see colour variation in the background. MMT will take care of this noise.
First you will need to create a mask that will protect the stars and target.
For this, make sure no mask is applied to your image. Extract a luminance layer (CIE L*) from the image, using the channel extraction process. Apply a histogram stretch to this channel. Make the background as dark as possible, and the stars and target as bright as possible. Don't care if pixels on either end are clipped. Then open the MultiscaleLinearTransform process and set the number of wavelet layers to one. Double click on the first layer to turn it off, and apply the process to the luminance layer. This will blur the image. If you want more blurring, undo the process; set the number of wavelet layers to two and turn both layers off. Then apply again.

Apply the luminance mask to the image and invert it. The target and stars are now masked, while the background is revealed for noise reduction.
Open the MultiscaleMedianTransform process and choose 7 wavelet layers. Set the mode to Chrominance (Restore CIE Y).
Enable noise reduction on only the first layer. Set strength to 5 and leave the other parameters as they are. Apply to a small preview.
You should see a lot of the small scale noise dissapear, but there is still a lot coarser noise left.
Increase the strength parameter to 7 and apply to the preview. Better? If you still want more noise reduction, increase strength to 10 and apply.
If you are satisfied, do the same for wavelet layer number 2.
Generally, you will need most noise reduction on the first layer (fine, single pixel scale detail), and less on higher number layers. Just test one layer at a time, until you are satisfied.
Then apply to the entire image.

MMT takes a while to run for the first time, but you will notice that it is much faster after this first time. This is because the process needs to calculate the wavelet layers. As long as you do not change the number of wavelet layers, it only does this once. The process is independent of preview size. This also means that once you've found the best settings, the process is very fast on the whole image.
Don't forget to remove the mask once you're done.
Here's a before and after image.
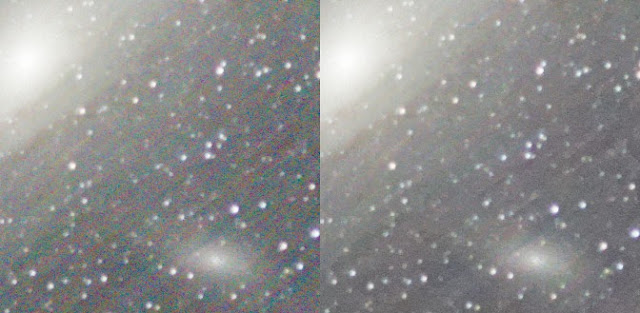
Before and after chrominance noise reduction, using MMT

Tip: don't delete masks, because that will break the links in the process history. Just minimise them and move to one side.
Note that in the example image, the streaks are created by residual hot pixels during the stacking process. Dithering will eliminate this effect.

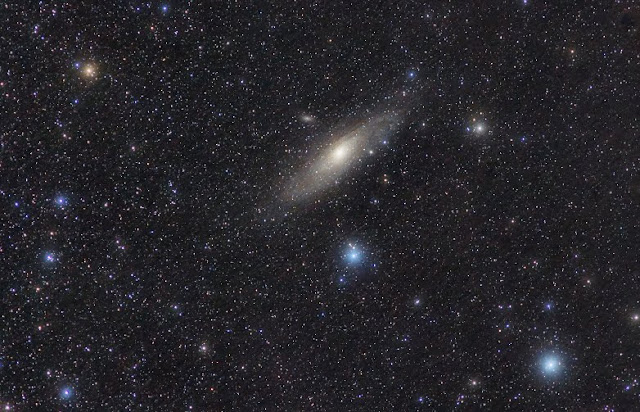
BTW, here's the final image.
torsdag 7 juli 2016

Dithering in hardware

A common source of noise in astro images taken with a DSLR is hot pixels that were not removed in the calibration process.
When light frames are registered and integrated, and the tracking wasn't spot on, these hot pixels end up as streaks or "rain" in the final image.


Extreme crop of an unprocessed (but stretched) integrated image
Normally, a dark master frame is supposed to suppress hot pixels in the light frames before registration and integration. For a non cooled DSLR, it is very difficult to match the master dark to the light frames. Therefore, faulty pixels remain after the calibration process.
There are various processing tools that can be used on the raw image frames to remove hot pixels. These tools rely on filters that remove intensity values from either the individual frames, or from the stack of images that are to be integrated. By careful use of these tools, most of the noise can be reduced. The noise that remains in the final master image, can be further reduced during post processing.


Crop of the same area after processing
While the hot pixels can not be removed during data collection, the pattern they form after integration can be altered. The streaks in the first example were caused by tracking issues. If tracking had been spot on (e.g. through guiding), the hot pixels would not have formed a pattern, but be visible as bright points in the final integrated image.
If the camera is moved a few pixels in a random way, no streaks will form and the noise will not be visible. This technique is called dithering and was suggested by astrophotographer Tony Hallas.
Cameras are usually controlled by software running on a laptop, and many of these have the option to apply dithering.
However, most software is written for either Canon or Nikon cameras, and may not work with other brands. I use a Pentax K20D for all my astro work, and this camera has issues when trying to connect to a computer, so software controlled dithering is not possible for me.
The only way for me to use dithering was to sit next to the camera and manually move the camera in RA or DEC between exposures. Doing this during winter, trying to get 50+ exposures, was not my idea of a fun time.
The solution to this problem was to build my own hardware device for camera control; a ditherbox.

The device intercepts the trigger signal from the intervalometer and sends it on to the camera. In between exposures, it also tells the mount to move in either RA or DEC. It does nothing else. I have to figure out at what speed to move the mount (and program this into the handcontroller), and for how long. The box only sends a "move" signal for the whole time between exposures. This time is set in the intervalometer and is determined by the number of pixels to be moved, the pixel size, and the focal length of the lens or scope.
The heart of the ditherbox is a small microcontroller from Atmel, the ATtiny 84. All inputs and outputs are isolated through optocouplers, and it receives its power from the SynScan handcontroller. So there are no extra batteries or power cables involved.
More information on the device can be found on Stargazers Lounge. The software can be found on my Github site.
And here is an example of the benefits of dithering.
(NB: this image, while showing the same area of the sky, was taken with another focal length and under different conditions.)


Same area in the sky, imaged using dithering;
unprocessed (stretched) integrated image